How to configure the OpenVPN server on the MikroTik router
OpenVPN is one of the most popular technologies for building VPN networks, and rightfully so. This product combines security with a simple setup and powerful network configuration and management capabilities.
Router preparation
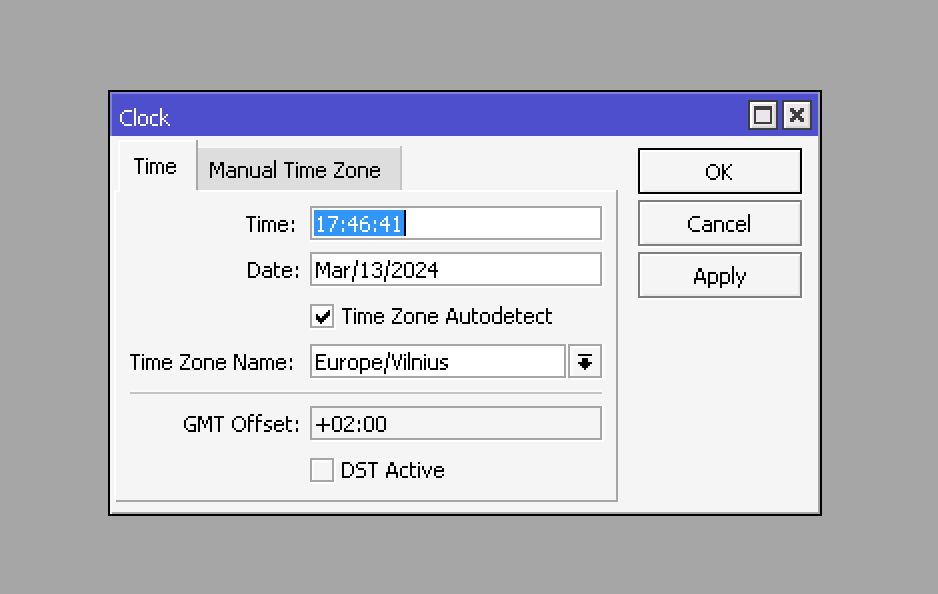
Like any other product that uses SSL encryption, OpenVPN is sensitive to time discrepancies between client and server. Therefore, we will first correctly set the time on MikroTik. First, open System -> Clock and set the correct timezone value.
This can be done in the console with the command:
/system clock
set time-zone-autodetect=yes time-zone-name=Europe/Vilnius
Create keys and certificates
Go to System -> Certificates and create a new root certificate for our certificate authority (CA).
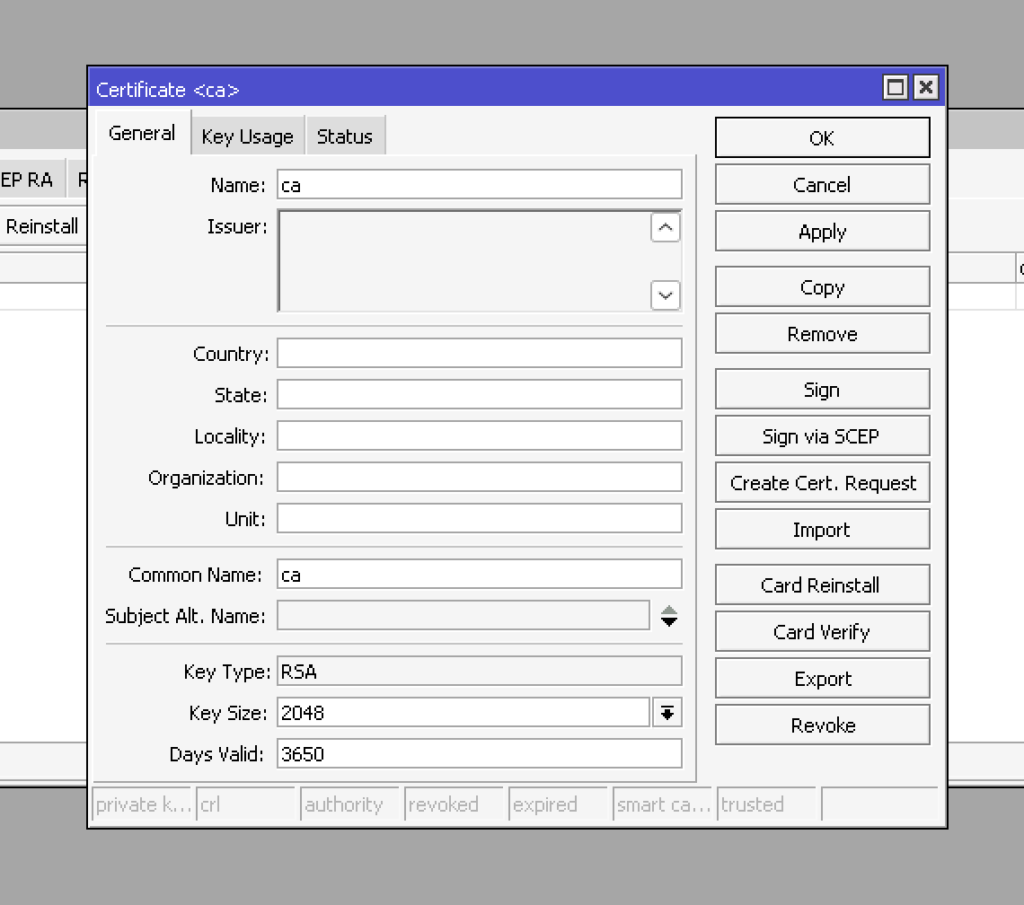
In the general tab, we need to provide the name, common name, key size, and number of days valid fields.
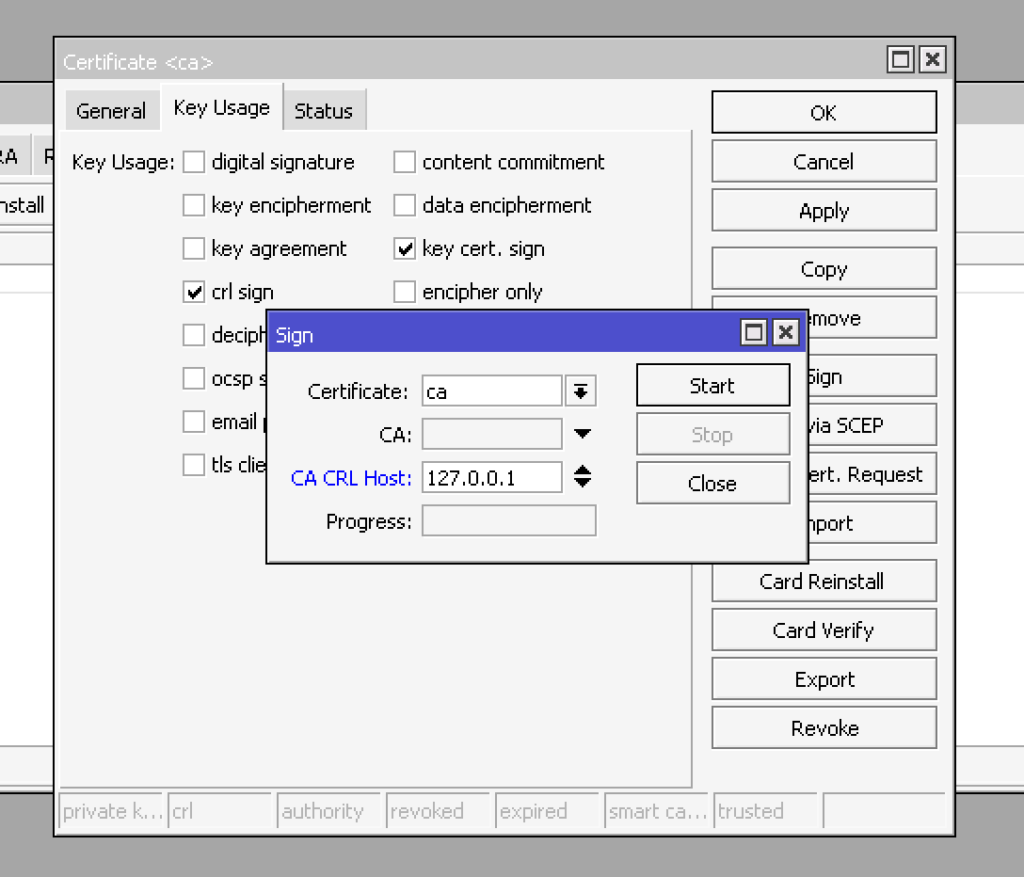
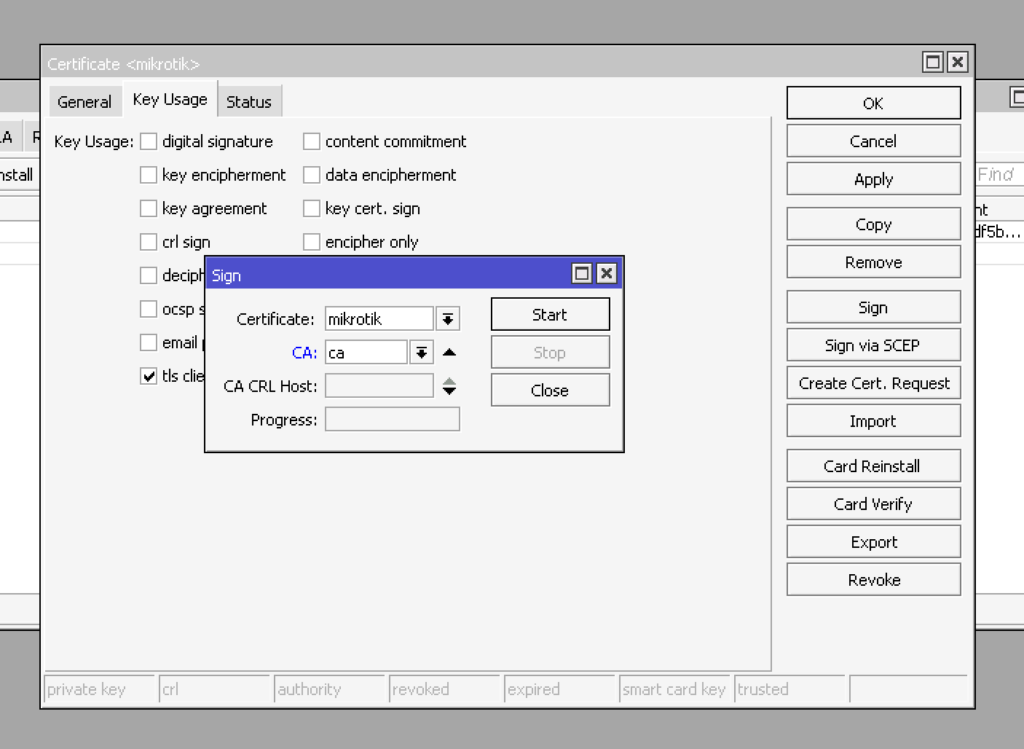
Next, open the Key Usage tab only, select the CRL sign and key cert. sign, and click the apply button. After that, we need to click the button sign, select certificate ca, put CA CRL host 127.0.01 in the open window, and click the start button.
This can be done in the console with the command:
/certificate
add name=ca common-name="ca" key-size=2048 days-valid=3650 key-usage=crl-sign,key-cert-sign
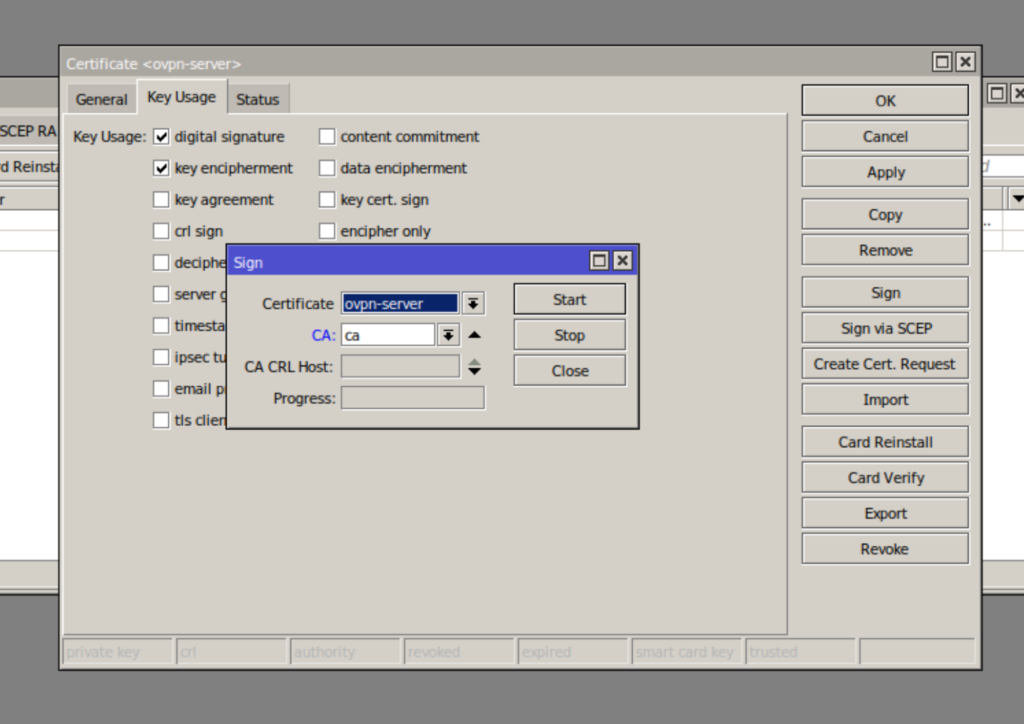
sign ca ca-crl-host=127.0.0.1Next, we create a certificate and a private server key. The General tab of the new certificate is filled in the same way; only in the Name and Common Name fields do we indicate ovpn-server (you can choose it at your discretion). Specify digital signature, key encryption, and tls-server on the Key Usage tab. Then, we will sign the certificate with our CA key. For this, in the CA field, select only the certificate CA created by us.
This can be done in the console with the command:
/certificate
add name=ovpn-server common-name="ovpn-server" key-size=2048 days-valid=3650 key-usage=digital-signature,key-encipherment,tls-server
sign ovpn-server ca="ca"
Create client certificate
Now, let’s create a client certificate. We indicate the certificate’s name in the name and common name fields on the General tab. It should be meaningful so that you can always determine which client the certificate belongs to. You should also think about the validity period of the certificate. If the client works remotely in the office, you can also issue a certificate for 10 years. Still, if the client is an employee’s laptop during the probationary period, then it is better to issue it for the probationary period. Issuing a new certificate is not a problem, while a certificate not revoked in time can lead to unauthorized access and data leakage.
On the key usage tab, we specify only tls-client and also sign the certificate with our CA’s key. You can immediately issue all the necessary client certificates or create them as needed.
This can be done in the console with the command:
/certificate
add name=mikrotik common-name="mikrotik" key-size=2048 days-valid=365 key-usage=tls-client
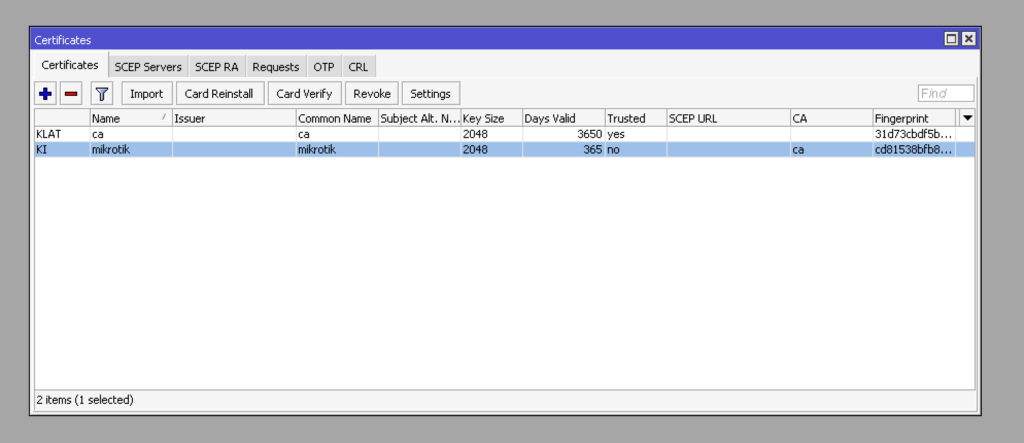
sign mikrotik ca="ca"Please note that in this case, we issued a certificate with a validity period of 1 year: days-valid=365. If everything is done correctly, then you will have the following certificates. Note that the root certificate must have the KLAT flags, and the others with KI flat.
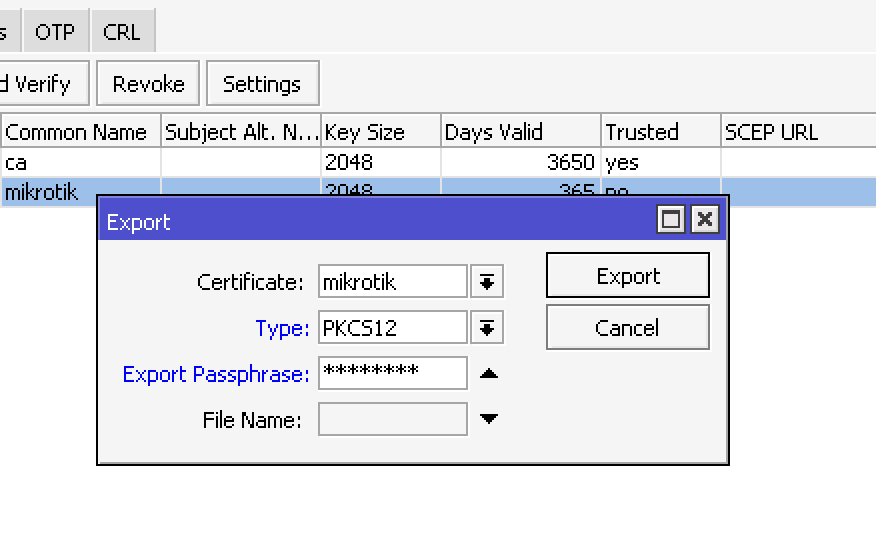
To use it on a client, we need to export the client’s private key and certificate, as well as the root certificate of the certification authority. It is most convenient to use the PKCS12 format, which contains all the necessary components in one file (certificate, key, and CA certificate). Just right-click on the desired certificate and select Export. In the open window, specify the type format PKCS12 and put the password phrase for export (minimum 8 characters) in the export passphrase field. Without specifying a password, private keys will not be uploaded, and you cannot use such a certificate for the client.
This can be done in the console with the command:
/certificate
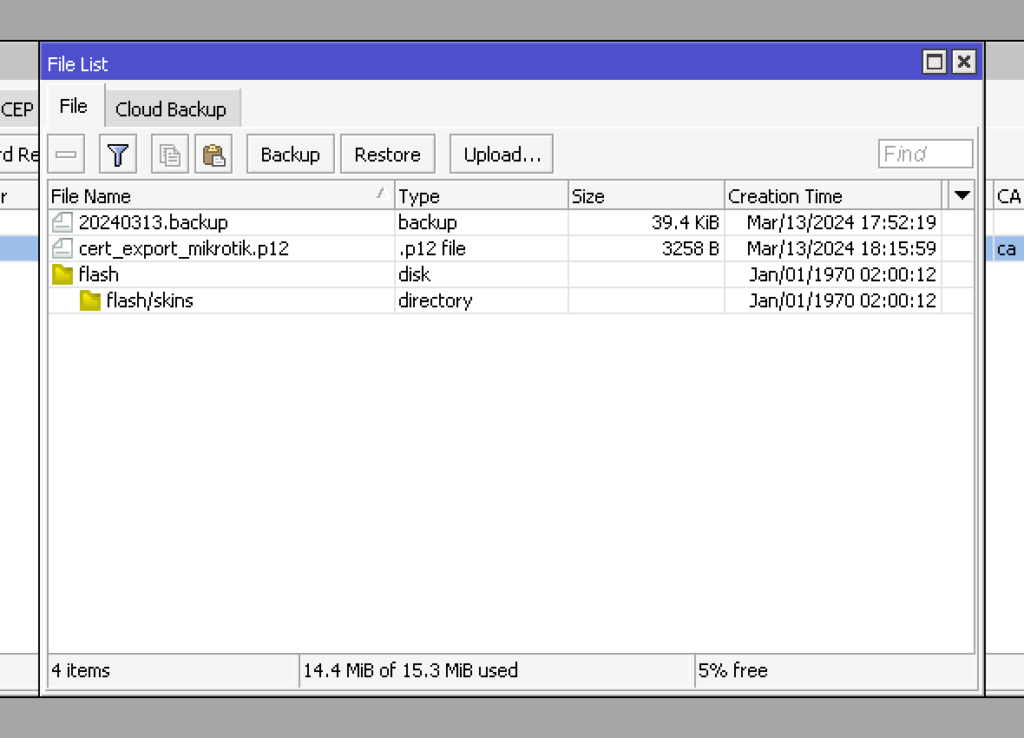
export-certificate mikrotik type=pkcs12 export-passphrase=mikrotikNow you can download your certificate from the Files menu.
OpenVPN server setup
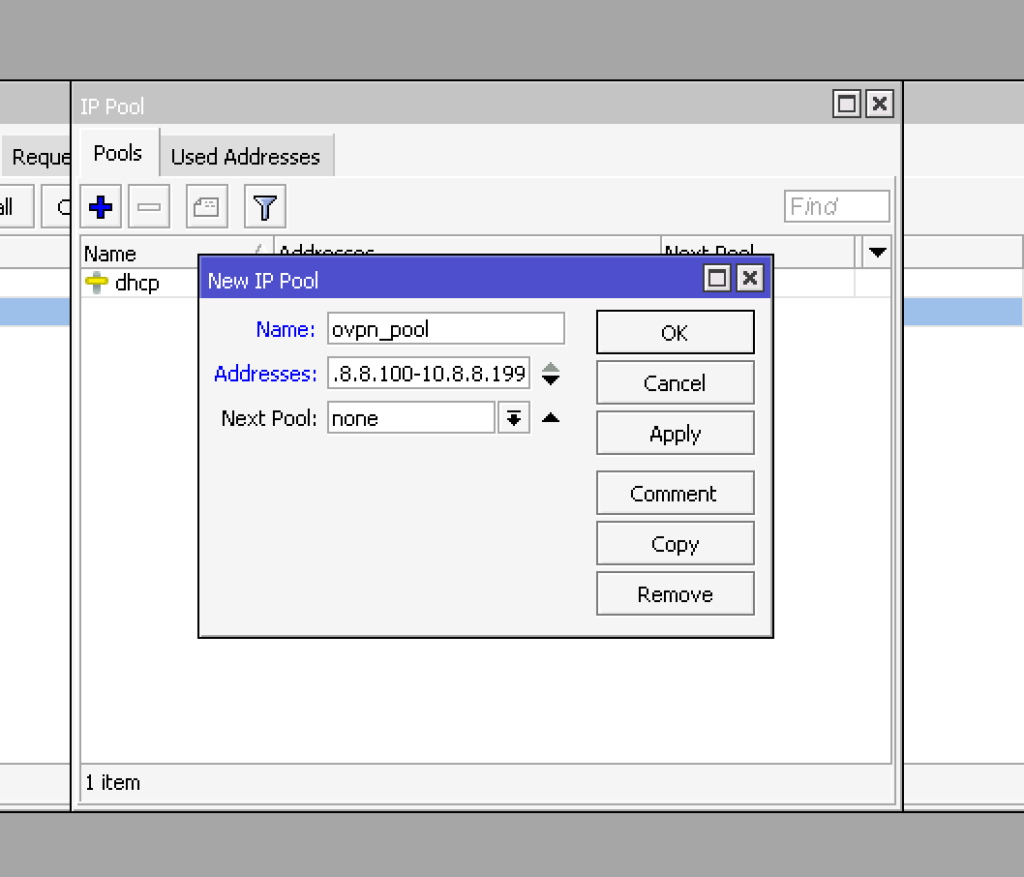
We need to create a pool of addresses to issue OpenVPN to clients. Let’s go to IP -> Pool and create a new pool to do this. In the field name, we put ovpn_pool. In the addresses field, we use 10.8.8.100-10.8.8.199 – the range of addresses for issuing clients. You can also choose any IP range for your VPN network.
This can be done in the console with the command:
/ip pool
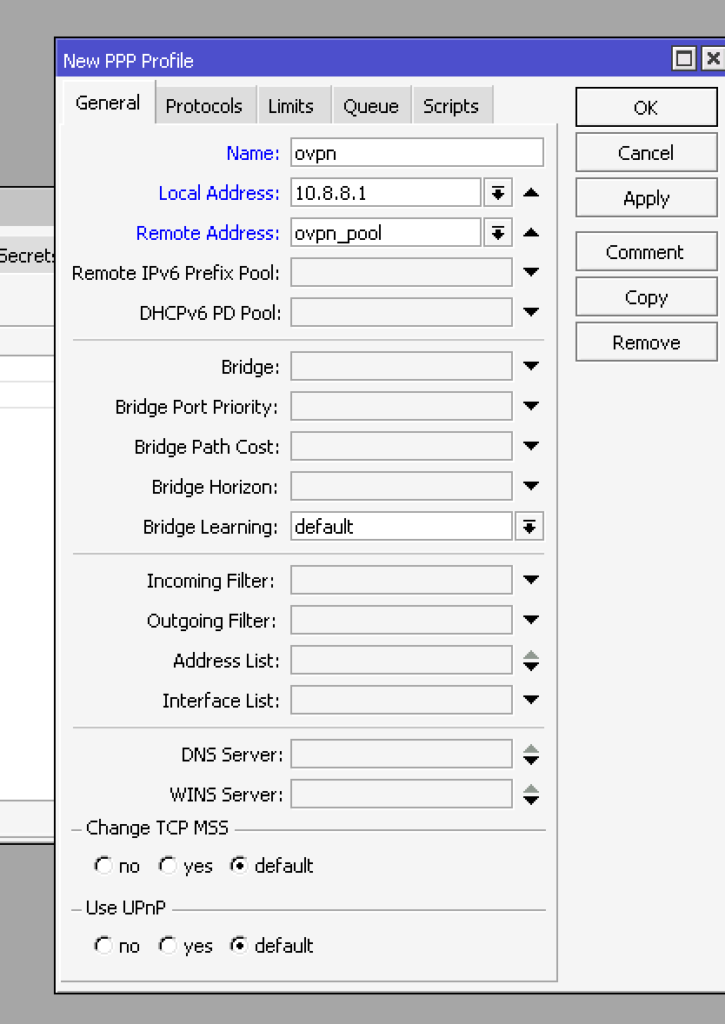
add name=ovpn_pool ranges=10.8.8.100-10.8.8.199Now let’s go to PPP -> Profiles and create a new profile. Let’s indicate its name Name – ovpn, local and remote addresses: Local Address – 10.8.8.1, Remote Address – ovpn_pool0. Just in case, remember that the local address must belong to the same /24 network as the address pool range.
This can be done in the console with the command:
/ppp profile
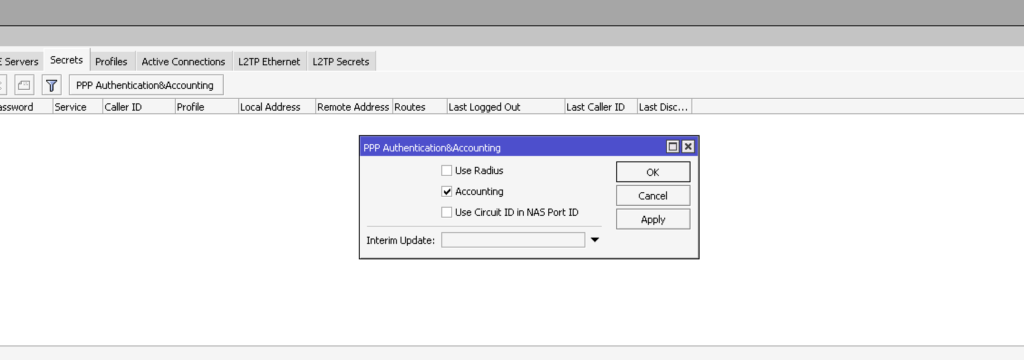
add local-address=10.8.8.1 name=ovpn remote-address=ovpn_poolThen let’s go to PPP – Secrets and ensure user authentication is enabled. To do this, click PPP Authentication & Accounting, where the Accounting flag should be.
This can be done in the console with the command:
/ppp aaa
set accounting=yes
Now, we will create accounts for clients. A feature of the OpenVPN implementation in RouterOS 7 is the mandatory use of username and password authentication. I recommend using the same name as on the certificate. Service which services can use this account we limited only to OpenVPN by selecting “ovpn,” then specify the profile we created earlier, “ovpn.”

This can be done in the console with the command:
/ppp secret
add name=mikrotik password=123 profile=ovpn service=ovpn
After creating users, go to PPP -> Interface and click the OVPN Server button. Enable the service in the open window by setting the enabled flag and default profile to ovpn. In the certification field, indicate the server certificate we created. For additional security, let’s select “require client certificate”. In this case, the server will check the client certificate to see if it belongs to the local CA certificate chain.

This can be done in the console with the command:
/interface ovpn-server server
set auth=sha512 certificate=ovpn-server cipher=aes256gcm default-profile=ovpn enabled=yes require-client-certificate=yes
Also remember to allow incoming connections to your OpenVPN server. Let’s open IP – Firewall and add the rule: Chain – input, Protocol – tcp, Dst. Port – 1194. The action can be omitted, since accept is used by default.
 This can be done in the console with the command:
/ip firewall filter
add action=accept chain=input  dst-port=1194 protocol=tcp
Now we are finished the setup of the OpenVPN server based on the MikroTik router.