How to install Webmin on Debian 12
Webmin is a powerful and flexible web-based server management control panel that allows you to administrate your Linux server through a browser-based interface. With the admin, you can manage user accounts, configure DNS settings, manage the MySQL/MariaDB database server, configure the Apache server, and change settings for a standard package on the fly.
In this tutorial, you’ll install and configure Webmin on your server and secure access to the interface with a valid certificate from Let’s Encrypt.
Step 1. Installing Webmin
First, update your server’s package index if you’ve not done so recently:
apt-get updateThen, we must add the Webmin repository to install and update Webmin using our package manager. The simplest and best way to get Webmin is to use automatic setup-repos.sh script to configure repositories on your Debian 12 system. It can be done after executing this command:
curl -o setup-repos.sh https://raw.githubusercontent.com/webmin/webmin/master/setup-repos.sh && sh setup-repos.shThis script will automatically set up the Webmin repository, install GPG keys on your server, and provide a Webmin package for installation and easy upgrades in the future.
Next, update the list of packages again to include the now-trusted Webmin repository:
apt-get updateThen install Webmin:
apt-get install webmin --install-recommendsOnce the installation is finished, you can access its interface by entering https://your_server_ip_address:10000 in your browser as root with your root password or as any user who can use sudo. Check that your firewall configuration allows access through port 10000.
Let’s secure access to Webmin by adding a valid certificate.
Step 2. Adding a Valid Certificate with Let’s Encrypt
Webmin is already configured to use HTTPS but uses a self-signed, untrusted certificate. Let’s replace it with a valid certificate from Let’s Encrypt.
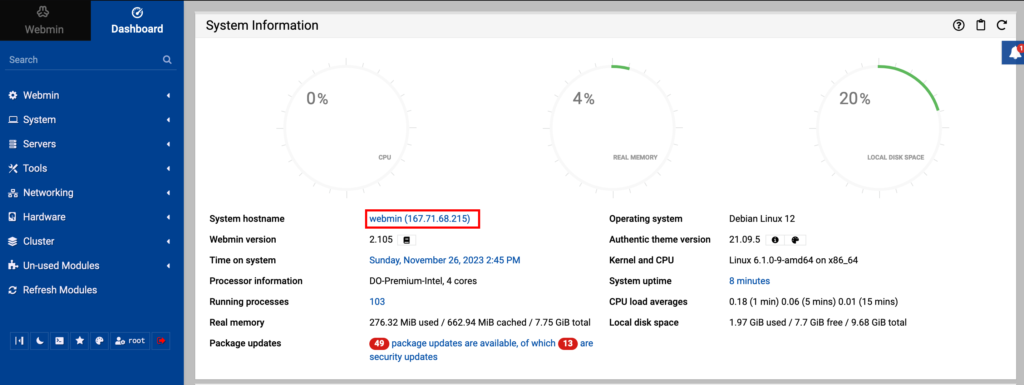
Navigate to https://your_domain:10000 in your web browser, replacing your_domain with the domain name pointing to your server’s IP address. You will see a login screen. Sign in with the root user you created earlier. Once you log in, the first screen you will see is the Webmin dashboard. Before applying for a valid certificate, you must set the server’s hostname. Look for the System hostname field and click on the link to the right, as shown in the following figure:
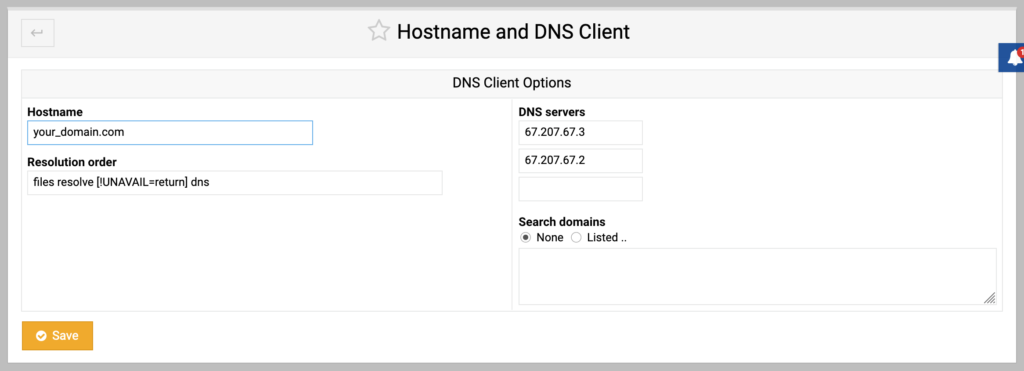
After clicking on the system hostname, you will be redirected to the hostname and DNS client page. Locate the hostname field and enter your FQDN (Fully Qualified Domain Name). Then click the save button at the bottom of the page to apply the setting.
After you have set your hostname, click on the Webmin dropdown menu in the left-hand navigation bar, and then click on Webmin Configuration. From the Webmin Configuration page, select SSL Encryption from the list of icons, and then click on the Let’s Encrypt tab. You’ll see a screen like the following figure:
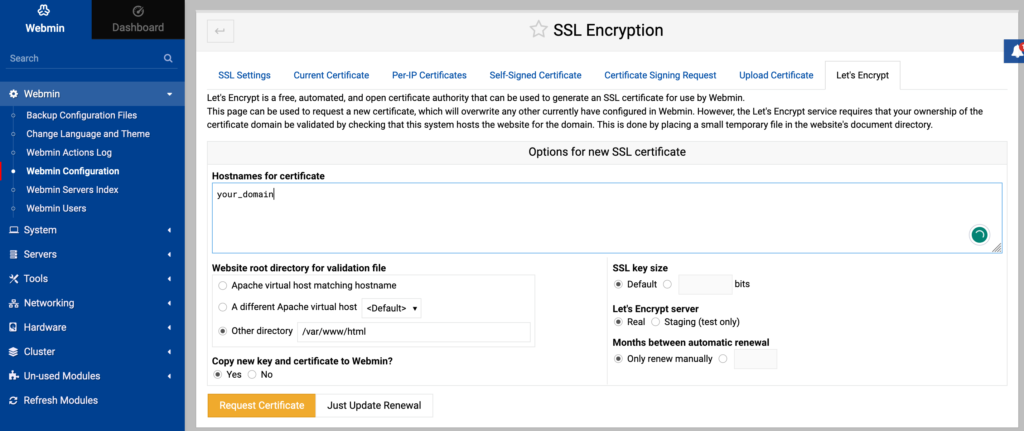
On this page, you can obtain and renew your certificate for the Webmin. Your Let’s Encrypt certificate will expire after 90 days, but you can configure Webmin to attempt to renew it every month automatically.
Follow these steps to set up your certificate:
1. Fill in the Hostnames for the certificate with your FQDN.
2. For the website root directory for the validation file, select the other directory button and enter your website’s document root, e.g.,/var/www/your_domain.
3. For months between automatic renewal selections, deselect the “only renew manually” option by typing 1 into the input box and selecting the radio button to the left of the input box.
Click the Request Certificate button. After a few seconds, you will see a confirmation screen. Click the Return to Webmin configuration button on the confirmation screen to use the new certificate. From that page, scroll down and click the Restart Webmin button. Wait around 30 seconds, then reload the page and log in again. Your browser should now indicate that the certificate is valid.
Sources: